How to bulk import subscribers into Leaky Paywall (and trigger a welcome email)
Moving subscribers from another platform into Leaky Paywall means getting the data in the right format.
Here is an example csv file with the correct fields needed to import into Leaky Paywall. We recommend downloading the file and using it as a template for your CSV import file.
Although we can't manipulate your data directly we are happy to guide you through the process.
Here are 2 methods to get your data imported:
Method 1: Use our plugin
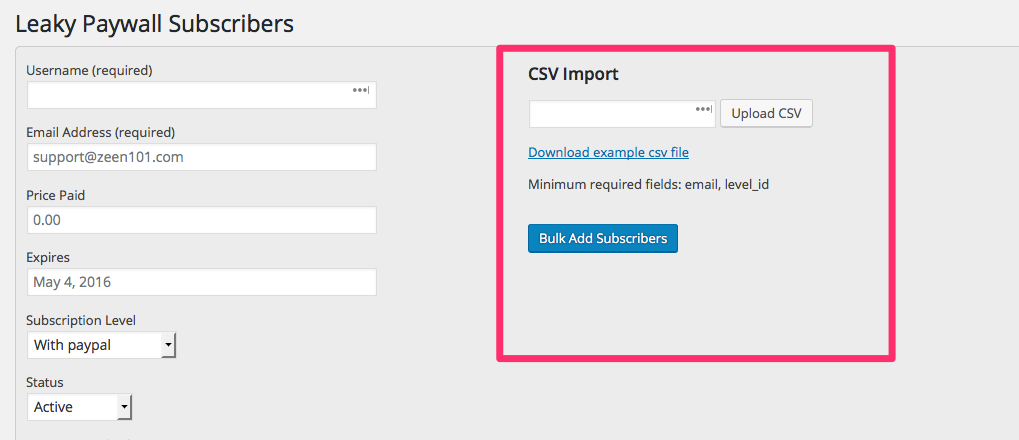
With the bulk import subscribers extension you can import a large list of users at once with a CSV file. When you install the extension, a new section will appear on the subscriber page that will let you upload a CSV file.
Note: The bulk import plugin will not trigger the welcome emails.
Don’t have the Bulk Import Subscribers add-on? Get it here.
The only required fields are email and level_id, but there are many more fields you can import for a subscriber.
Subscriber Fields
email
The unique email address of the user. If the email address belongs to a user that is already registered on your site, then their subscriber information will be updated instead of creating a new user. This can be helpful if you would like to bulk update the expiration date of a group of subscribers, for example.
username
The unique username of the user. If no username is specified, one will be generated from the user’s email address during import.
level_id
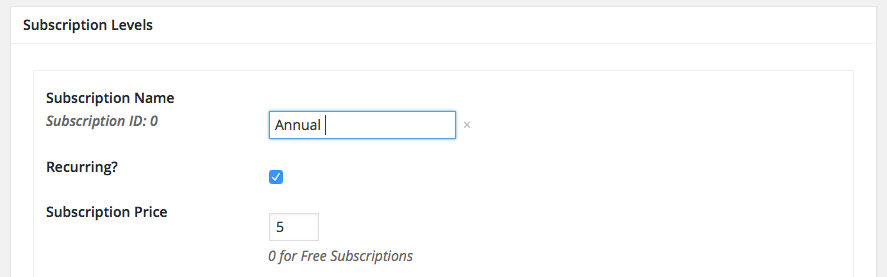
The level ID that the user will be subscribed to. You can find the level IDs by going to Leaky Paywall > Settings and scrolling down to the Subscription Levels section. Under the subscription name you will see the Subscription ID number. This is the level ID.
subscriber_id
The subscriber ID is custom ID that you can assign to a user. It is not required but can be helpful if you need to track the user by the ID of another system’s database you are using, like a CRM. If you are importing from a payment gateway like Stripe, you would use the cus_xxxxxx ID.
price
The price you charged the user. This is useful if you charged the user offline for the subscription. Note: Even if you add this field, Leaky Paywall will not actually charge the user. If no value is set, the default will be 0.00.
plan
The plan the user is subscribed to. For manually created subscribers, this is usually Recurring or Non-Recurring. If no value is set, the default will be Non-Recurring.
expires
The date the subscription expires. Please use the following format for your date: June 5, 2020. You can also use: '0000-00-00 00:00:00' for subscriptions that never expire. If no value is set, the default will be Never.
status
The current status of the subscriber. This can be set to: active, deactivated, or canceled. If no value is set, the new subscriber status will be set to active.
The first name of the subscriber.
The last name of the subscriber.
The password the user will use to login to WordPress.
The payment gateway to use for the subscriber (stripe, manual, paypal). If no value is set, then manual will be used.
My import isn’t working
It could be the line feed code of the CSV file. Make sure the CSV file is exported in UTF-8 format.
Sometimes Excel saves the CSV in a format that doesn't work well with the importer. If you're having trouble with the csv file, try opening the csv file in Google Sheets and then exporting it as a csv file from that program.
How to send the welcome email during bulk import
You can add this code snippet to send the welcome email to new subscribers during a Bulk Import. Make sure the bulk import file has no more than 20 users. Otherwise the emails may not all be sent due to timeout issues.
Method 2: Use an import plugin (How to Add Subscribers Using WP All Import)
You can try a plugin like WP All Import to add usermeta to WordPress users. http://www.wpallimport.com/add-ons/user-import/
1. Upload csv file and choose new items > users
2. Set login, email and password in User Data section
3. Set leaky paywall custom fields:

_issuem_leaky_paywall_live_expires
e.g. 2020-06-17 23:59:59
_issuem_leaky_paywall_live_level_id
e.g. 0, 1, 2
_issuem_leaky_paywall_live_subscriber_id
e.g. cus_1234789423, 278392
_issuem_leaky_paywall_live_description
e.g. Online Only, 3 Month Access
_issuem_leaky_paywall_live_payment_gateway
e.g. manual, stripe, paypal
_issuem_leaky_paywall_live_payment_status
e.g. active, deactivated
_issuem_leaky_paywall_live_interval
e.g. year, month, week, day
_issuem_leaky_paywall_live_interval_count
e.g. 1, 2, 3
_issuem_leaky_paywall_live_created
e.g. 2019-06-17 17:22:39
3. Set any, additional custom fields
_company, _phone, _address, etc.
4. In record matching, select “create new users from records newly present in your file” and “update existing users with changed data in your file"

5. Select “choose which data to update” and check “meta fields"
1. Select “update only these meta fields, leave the rest alone"
2. Input the same custom fields added in the previous step
6. Select “block email notifications during import"